It’s time to take your closet organization to the next level. Get excited, because once your closet is organized, I can almost guarantee you will feel more peace and excitement about getting other areas of your home cleaned up!
Make sure, BEFORE you listen and take notes on Part 2, that you’ve done the steps in Part 1. Here is >> Part 1.
A bonus tip – this is best done with a friend or partner that will tell ya like it is! They will be your logic when you are trying to convince yourself to keep that old ratty holy sweater!
Okay, lets get to it!
Step 1 – Take Everything Out of your Closet
Do not sort anything yet! I repeat… do not sort anything! I simply want you to pull everything out and set it somewhere near by.
Hang all your clothing on the rolling rack. If you opted out of getting the rolling racks, then lay your clothing out so that you can see everything.
I want to make sure I’m clear here… take EVERYTHING out of your closet. Everything! Every shoe, every box, ever sock… everything.
Step 2 – Go Through your Items and Sort
Go through every item and sort them according to the following:
Throw away – there are certain items we own that have holes and are in a condition in which organizations will not accept, so save them the time and man hours and just put it in the trash.
Donation or Gifting – these are items either you can give to a group of friends to dig through, or can go directly to a charity.
Maybe – this pile better be small people!!! Our end goal is to keep very few items, items of quality, and items that you absolutely love the way you look in them – so this pile is for the undecided pieces.
Yes – the YES pile contains the items of clothing you definitely want to keep! These are pieces that you love love love and wear all the time.
Step 3 – Transfer Yes Pile to Huggable Hangers
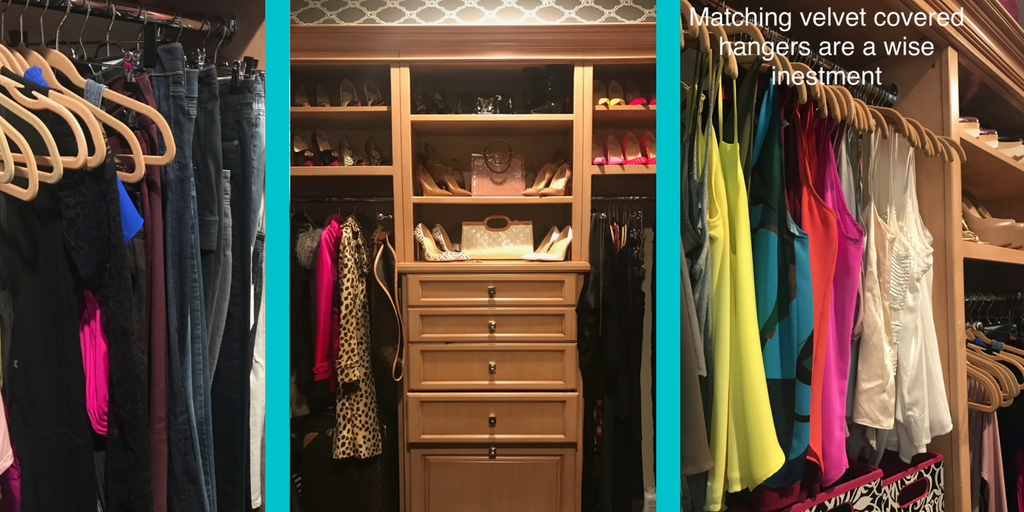
Take your yes pile and transfer those items of clothing on to your huggable matching hangers that I told you order in Part 1. Make sure you group together types of clothing. So for example, put all of your sweaters together in an area, your pants in one area, your suits in one area, etc.
Along the way, think about what hasn’t worked up to this point, and ask yourself what do I need to add to make my closet more efficient? This is different for everyone. Is it hooks? More hangers? Shelves? Just think about what would be ideal, and make it happen. And remember the goal is for your closet to be as simple as possible.
Step 4 – Separate all of your throw away items.
Maybe place them automatically in a trash bag so that you aren’t tempted to pull them back out and add them to a different pile.
Step 5 – Move your Donation / Gift Items
Take all of your donation / gift items and place them at the end of your rolling rack. So keep them separate from your yes items and your maybe items.
Items that NEED to be in your donation pile:
>> ANY article of clothing that you have had for 6 months to a year and you have NOT worn. For example if you purchased a sun dress last summer and you never wore it… you aren’t going to wear it next summer! So get rid of it!
>> An item that you purchased to “go with something else” or for a particular event. So for example, say you purchase a beautiful blouse that just needs the right pair of pants. But you’ve never bought the pants, and therefore you’ve never worn the blouse.
>> Anything that doesn’t fit you right! Its too small, too big, or just all the wrong proportions for your body type.
>> Not in style. Be honest here. Is it a current item, OR is it an item that dates you?
Items that go in the maybe pile:
>> You have a general sense that you should get rid of it, but it hurts your heart to let it go. These are the things that you need to have a friend who’s going to shoot straight with you, tell you like it is! They will help you determine if whether this item of clothing should go in the donation pile.
>> Pieces that will work once you get them altered. But I want you to ask yourself, “am I honestly going to go through the hassle to get this item alter?”
>> Items you have multiples of the exact same thing.
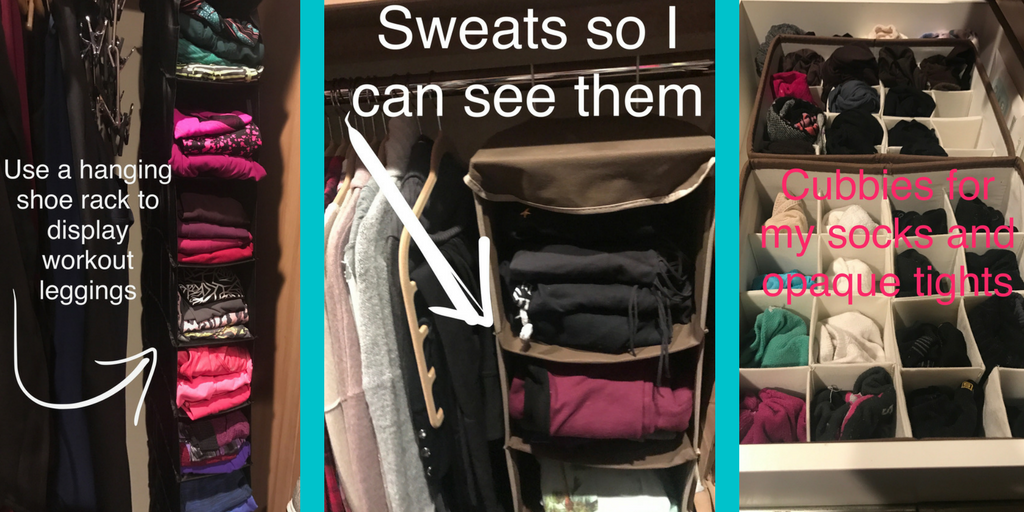
Once you’ve sorted through everything, put everything that you’re keeping back in the closet. Display things so that you can see them!
Organize your items by type of piece, and then by sub categories such as length. So for example, for shirt you'll have long sleeve, short sleeve, no sleeve, strap, halter all separated out and hung together. Next, within the sub categories hang from either dark to light or light to dark.
I want to see your revamped closet! So if you are on Instagram, tag me and use the hashtag #SmartCloset and I'm going to be searching for these!
To listen to the FULL episode of Smart Closet Part 2, just hit play below!
